About johart1

I work with returners to learning, and in a professional development context sharing my online/e-learning experience with colleages and supporting them in developing blended approaches to learning. I am also currently a facilitator for our state Adult Literacy and Numeracy Network. From 2008 to the present I have facilitated a number of e-learning projects (including Innovations (Australian Flexible Learning Framework), Equity Development, National Vocational E-Learning Strategy, Foundation Skills). I see online/e-learning as another tool in our toolbox, and one with particular relevance for the geographically isolated learners in our huge Wheatbelt catchment area.

Edublogs webinar overview – the Global Classroom project

Introduction

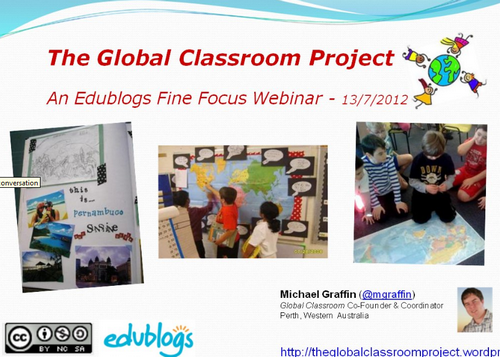
In this session, recorded as always, we heard from Michael Graffin about the variety of projects that have formed part of the “Global Classroom Project” (#GlobalClassroom) this year.

The Session

Michael took us on an incredible journey. He started with some background, firstly explaining how the Global Classroom came about and its reach both geographically and in numbers. Then moving on to the aims and ethos of the community.

For me the most exciting part was the project stories – Michael shared the project stories and some of the highlights of the year. We were lucky in that Lin-Lin Tan from Taiwan, one of the teachers involved in several projects was able to join the session. She told us a little about how the Global Classroom projects have affected her and her students.

Michael moved on to consider some of the impacts of Global Classroom on teachers and some lessons learnt. Finally he turned to the future with thoughts for next year’s #GlobalClassroom.

Conclusion

This was a fantastic session! Michael gave us a brilliant overview of Global Classroom and the projects. Chat was very lively throughout with many ideas shared and also links to many of the projects (thanks to Anne Mirtschin for her help in dropping links into chat). If you are looking to be both inspired and awe inspired then this is a MUST catch recording!

Next Webinar

Our next session will be an Edublogs “Serendipity” session on Thursday July 19th at 23:00 GMT/UTC (Afternoon/Evening USA) or Friday July 21st at 7am West Aus, mid morning Eastern States Aus depending on your timezone (check yours here) – in the usual BlackboardCollaborate room. This is one of our fortnightly unconference sessions where we invite you to bring along your “hot topics” and “burning issues” for our poll on the topic

Edublogs webinars – two overviews

Introduction

Despite my best intentions I didn’t succeed in doing the overview for our most recent FineFocus webinar. So this overview is of that “Sharing our Pecha Kuchas”webinar and the Serendipity session from the following week.

Sharing Pecha Kucha

This session, recorded as always, was great fun! Over the past few weeks we have talked several times about Pecha Kucha and this session consisted mainly of sharing three very different first attempts at  Pecha Kucha and then discussing the challenges and the way we had each approached the development.

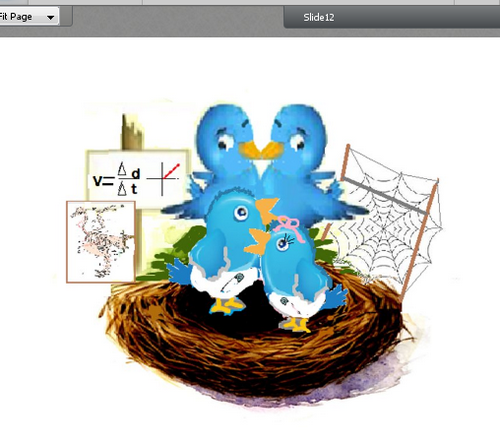
The three sessions were “Mad About Maths” by @philhart, “The Gifted Tweet Family” by @jofrei and “About the Webinars” by myself.

These were totally different from one another in content, content purpose, style, and in the way we each approached the development. The recording is definitely worth catching

Serendipity – “personal hubs” could Symbaloo or others replace iGoogle?

This week’s topic in our recorded Serendipity webinar was generated by the news that Google is closing down iGoogle. This was at the front of my mind when we started the session and so I suggested the topic. The preliminary chat gave a consensus to talk about this and the possiblity of using Symbaloo or similar as an alternative.

We looked at Symbaloo through an AppShare and discussed its uses briefly, this led to a short exploration of Sqworl which is also a visual bookmarking tool. Definitely one to explore in the future! The discussion moved on and I shared my own personal iGoogle to illustrate the many feeds and other content that I draw together into one place. Because I have used iGoogle for several years to help me manage content, feeds and links (anywhere, anytime and anydevice) and I have so many things in one place I think it will be hard to find a replacement. Another possiblity suggested was Chrome, again probably worth exploring, but of no use for this purpose if you have to have the Chrome browser installed first.

I have seen other alternatives suggested although we didn’t look at these – they include MyYahoo, Netvibes and Pageflakes. I am currently exploring the first two of these but haven’t worked out how to get GoogleReader to feed in (if anyone knows please let me know how). When I tried to access the third of them I could not as it was too busy so I have abandoned that one!

Our Next Session

Our next Webinar is an Edublogs “Fine Focus” session where Michael Graffin  the Coordinator of The Global Classroom Project (#GlobalClassroom) will be sharing this year’s GlobalClassroom experiences. Join us on Thursday July 12th at 23:00 GMT/UTC the time for you will vary depending on your timezone (check yours here) Thursday afternoon/evening in the USA, late night Thursday in Europe, and Friday morning July 13th in Australia – in the usual Blackboard Collaborate virtual room.

Edublogs Serendipity webinar – miscellany

Introduction

This was a Serendipity session where we didn’t vote on a topic! As has been the case often recently we were a very small group. The session was recorded and discussion centred around three areas:

  • How can we encourage more people to attend/should we continue the webinars at all?
  • Possible topics and speakers for future webinars
  • Help/ideas for getting the balance of words and slides right in Pecha Kucha

The webinars

Our attendance has always been very variable, but from late 2008 when the webinars began until mid 2011 attendance was almost always well into double figures. However during the last year this has reduced. I think this may be due to a number of factors:

  • There are now so many free webinars each week that people cannot attend all they would like to.
  • A tendency for people to “catch the recording” instead of joining in. The highly interactive nature of our webinars means that fewer participants leads to a reduced range of ideas and opinions. Also if no-one joins then eventually there will be no webinar to record!
  • The many other e-PD opportunities such as #tag chats on Twitter of which there are now hundreds.
  • Not enough publicity, forward planning of FineFocus sessions, variety of topics and variety of presenters. My fault! Work pressure has been intense for the last year. I am hopeless at asking people to present for us – I just feel totally that I am imposing on them and also worry that attendance will be low and they will feel it isn’t worth doing.
  • Timing of webinars – our early participants were mainly from the USA/Canada where it is afternoon/evening and this is often a good time for people to join. However with the huge increase in available e-PD including webinars that originate in the USA our overseas participation has reduced. We now have more Australians attending, however the early/mid-morning time is not good for many.

We discussed the above issues and also @jofrei shared her blogpost on promoting the webinars with a great mindmap of ideas. This was an outcome from a previous similar discussion last year.

We also talked a little about possible topics and presenters. Topics are usually relatively easy as it is always possible to have a discussion session about a currently “hot” e-topic or to mutually explore tools for a specific purpose. However for me finding possible presenters is a real issue. As I said earlier I am just no good at asking people – I always feel so much that I am imposing on them. Also I lack the time to find and ask possible presenters – not helped by the fact that because of work pressures I have been less active in my PLN over the past year and so I have a lower profile than previously.

If you have thoughts or ideas about:

  • whether we continue the webinars
  • how to publicise better
  • topic suggestions
  • presenter suggestions (yourself or someone you know)
  • whether we change the format (from the alternate Serendipty/FineFocus) to something else
  • whether we reduce the frequency to one per fortnight or one per month

Please comment on this post or tweet me (@JoHart)

Pecha Kucha – getting the timing right!

In this part of the session we took a look at the Pecha Kucha that @jofrei is developing about “The Tweet Family” her story of the gifted Tweetlets.

One of the main challenges is being that of timing. and so we discussed the issue of timing. For me the rigidity of the 20 seconds per slide is also likely to be my main problem with developing a Pecha Kucha. We talked about some possible strategies to overcome the difficulty of some slides needing only a few seconds of talk and others needing much more than 20 seconds.

There will be more on Pecha Kucha in our next session – “Sharing Pecha Kucha” as we will share our attempts at Pecha Kucha and discuss the challenges we found as well as the content of our presentations.

Conclusion

An interesting session! The issue of continuing the webinars or not has been on my mind for a while. Also the related concerns about the need to find topics and presenters and publicise them better. So it was good to discuss this with others. Since Pecha Kucha came up as a topic in a recent Serendipity it has interested and intrigued me and others. I am unsure that it will ever be my strategy of choice but feel it is good to try it out and our next session gives us that opportunity to “play”

Our Next Session

Our next Webinar is an Edublogs “Fine Focus” session where we will be “Sharing Pecha Kucha”. In this session some of us who took part in a Serendipity where Pecha Kucha was a topic will share our “homework” and talk about the challenges. If you have a Pecha Kucha you would like to share let me know – a comment on this post or Twitter: @JoHart and bring it along.  Join us on Thursday June 28th at 23:00 GMT/UTC the time for you will vary depending on your timezone (check yours here) Thursday afternoon/evening in the USA, late night Thursday in Europe, and Friday morning June 29th in Australia – in the usual Blackboard Collaborate virtual room.

Creating publicity leaflets

Introduction

A well designed publicity leaflet can make a very large impact on the people you are trying to reach. Your leaflet should look professional and convince the reader that the organisation, product, service or event is of very high quality.

Below are some design ideas that will help you in creating a high quality product.

Content and Purpose

Keep the content limited – choose only one or two main purposes for a single leaflet. Some possible purposes for your leaflet are to:

  • highlight an aspect of a business,
  • canvas for members,
  • introduce a new aspect of an organisation,
  • present products/services,
  • publicise an event.

Decide on the audience. For example, if you are publicising/seeking members for a sport club for children will your audience be the children themselves or their parents? The audience will affect the words you might use in your leaflet and might also have an effect on the images you choose.

Audience by Drew McLellan
“Audience” Image by:drewm Drew McLellan Licensed under Creative Commons Attribution-NonCommercial 2.0 Generic (CC BY-NC 2.0)

Write the content next. Keep it simple – use short sentences, simple vocabulary, and short paragraphs. This will make your message more effective and easier for your audience to remember the main points.

Design, Organisation and Layout

Choose a size that allows you to include your content without it looking overcrowded but also avoids too much empty (white) space. The size should also suit your purpose.

Organise the text with headings/sub-headings. These headings are very important – they need to contain the whole message because many readers will skim read these to get the gist (overall idea) of the content. The text below the heading should expand on your message.

Contrasting colours are good for catching attention but take care not to overdo the colours. Make sure that text stands out from the background and the headings also stand out from the rest of the content.

Use images (graphics) that support the content. Don’t use them just because you like them. Emphasise your message by using text and graphics side by side. Images are good for making an impact. Colour images have been shown to hold the attention of readers. If you have a logo then use it to add more impact.

Information

Contact information is vital and must be accurate check the phone number, company name (spelling), full contact information, emails, websites etc. NOTE if you are making a leaflet as part of your studies you can invent contact details but be very careful that you do not accidentally use real details belonging to someone else.

Make sure that if other information is necessary that you include it – for example: opening hours, prices/costs, regular meeting times, regular match/game/coaching days and times.

Conclusion

Publicity leaflets need to be eye-catching, they also need to keep the attention of the reader once it has been “grabbed”.  Knowing your audience, using the strategies you have already learned for visual texts and planning your layout carefully will help you achieve this.


Edublogs webinar overviews – catching up on three!

Introduction

Once again I must apologise for my slowness in posting webinar overviews. I hope that from now on I will be back to posting after each session. The project that has taken almost all my time and energy for the last few months is complete! So I hope I will now have a little time for my PLN.

These three sessions were:

  • a Fine Focus – about using Symbaloo pages to help students keep on track in our online adult literacy course
  • a Serendipity in which we talked about and explored Pecha Kucha about which we knew very little at the start and much more by the end of the session
  • another FineFocus session – this one was delving a little deeper into some of the storymakers we tried out a few weeks ago through sharing stories and how we made them

 Online students staying on track

This session, recorded as always, was a look at one aspect of my now completed project where we have been trialling a new delivery strategy  for our online adult literacy students while also working to improve digital literacy and online study skills..

Issues that often arise with all students when using the Internet are those of: getting “off track” and becoming “lost in the surf”. These issues are a particular problem with online students as the teacher/lecturer is not “surfing” the physical room and so is unable to see when this might be happening and offer guidance.

The use of a project based approach with online students also has implications for teacher/lecturer time as students researching completely independently may all choose different websites of varying quality or even ones tht are not relevant to the task so the teacher/lecturer has to evaluate many sites.

This session looked at the combined strategies of “chunking” activities into “daily tasks” to help maintain focus, and then managing the links that students used by using topic based Symbaloo pages and colour coding the tiles for the different student levels and activites. Ownership was also provided through individual student choice of tiles for some activites.

I enjoyed this session – inevitably I think – because it gave me a chance to talk about the project that has been such a great success for the students and that I have enjoyed facilitating so much. Once my “mental dust settles” I intend to post more about the whole experience.

 Serendipity – What is Pecha Kucha?

This was a Serendipity (recording here) that “just happened” there was no vote on the topic which arose out of the chat before the formal start of the session.

The topic arose because one of our participants was considering submitting to present at a conference and the required form was Pecha Kucha. None of us knew very much about this as a presentation format (including the person considering using it). We were all interested to learn more!

This session was mainly audio and some textchat, with the whiteboard being used for occasional ideas and for some links about Pecha Kucha. We shared our preconceptions and then did some exploring individually to find out a little more about the method to enable us to discuss it more effectively.

Our discussion was wide ranging as we considered whether we might choose to use this ourselves and if so in what sort of context. There was some agreement that there were advantages for  some presentation where it could provide opportunities to “taste” several topics and then spend more time is Q&A with the presenter of the preferred topic. However this could be very frustrating if an attendee hd strong interest in more than one – or from the presenter perspective if all attendees focussed on one topic.

There was also some discussion about the merit of Pecha Kucha more as an art form than as a presentation strategy – an intriguing and appealing thought with which to end this great discussion!

Story Sharing

This recorded FineFocus session was a “spin off” from one a few weeks ago in which we took a look at some online story making tools in one of our “quick and easy tools” explorations.
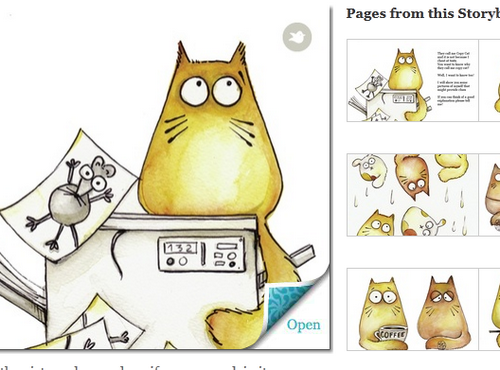
In this session we shared stories we had made. The star of our show was @jofrei who is a great storyteller! See her stories about Sprite et al  She hadfantastic examples from Storybird, Storyjumper and LittleBirdTales for us. Phil and Sandra also shared stories. Sharing the stories provided opportunities to talk in more depth about the pros and cons of each tool and also to share experiences in storymaking generally. I was guilty of not doing my homework but shared a great story created by one of my students.

Next Webinar
Our next session will be an Edublogs “Serendipity” session on Thursday June 21st at 23:00 GMT/UTC (Afternoon/Evening USA) or Friday June 22nd at 7am West Aus, mid morning Eastern States Aus depending on your timezone (check yours here) – in the usual BlackboardCollaborate room. This is one of our fortnightly unconference sessions where we invite you to bring along your “hot topics” and “burning issues” for our poll on the topic.

Edublogs Serendipity webinar overview – a lucky dip!

Introduction

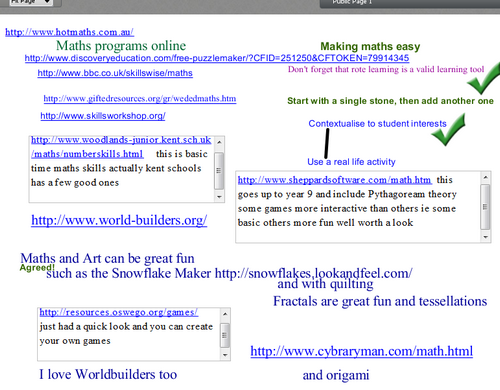
This was one of those sessions where we talked about several topics. As always the session was recorded and makes interesting listening. The consesus was to spend some time on each of several topics, these being: the vocational education system; online maths programs & making maths easy; and a quick chat about some iPad apps.

The Session

We used a whiteboard for each topic for a heading to help us maintain topic focus, but also to be available for ideas and sharing as needed. It was interesting that each of the topics was addressed differently in terms of the way we used BbC. This demonstrates well the capability of the platform as a learning space. The first topic (TAFE) was almost entirely discussed via audio and text chat. The second (online maths & making maths easy) made heavy use of the whiteboard for ideas and link sharing. Our third topic of iPad apps also used the whiteboard but to a much lesser extent mainly for sharing app names.

We were a small group – all Australian which  gave rise to one of the topics. Our public Vocational Education and Training system is currently the centre of much debate regarding funding. It is under pressure to compete for students with private trainers who do not have the same government imposed constraints – hence the heading of TAFE (Training and Further Education). I know I had far too much to say about this because it is my own sector and I care about it intensely! There were many comparisons to be drawn with other sectors and globally.

The maths topic – as is always the case with maths generated much activity. We had a whiteboard in two columns – for sharing links and ideas for making maths interesting. However so many links were shared that the second column was largely taken over by the first! If you access the recording and use the bottom scroll bar in it to scroll to about 3/4 of the way through you can access most of those links live from the whiteboard. These lead to a positive “treasure chest” of online maths!

Our final topic was a quick look, with short descriptions, at some of the apps that those of us with iPads have and find useful.

Conclusion

This was fun! As always (for me anyway) the great thing about our Serendipity sessions is that we never know where they will lead. Sessions where we range accross several topics are particularly interesting because of the diversity of information shared and views expressed.

Our Next Session

Our next Webinar is an Edublogs “Fine Focus” session.   Join us on Thursday May 31st at 23:00 GMT/UTC the time for you will vary depending on your timezone (check yours here) Thursday afternoon/evening in the USA, late night Thursday in Europe, and Friday morning June 1st in Australia – in the usual Blackboard Collaborate virtual room.

Using images to make instructions more helpful

Introduction

Simple instructions don’t always need images to make them more effective. For example recipes often don’t have images, and if they do they may often just have a picture of the finished item. However to make your instructions more effective it often helps to include one or more diagrams or other images.

How can images help?

Instructions are more effective if the number of words used can be kept fairly small. The old saying that “a picture is worth a thousand words” is very relevant for writing instructions because using an image with labels can remove the need to write long descriptions. For example the labelled picture of a chain saw below would save many words in instructing how to find the “fuel filler cap” and fill the saw with fuel.

Including the picture and referring to it from the instructions saves writing a detailed description of the “fuel filler cap”, where to find it on the saw, and how to distinguish it from the “oil filler cap”.

It is possible to make instructions even more visual especially if you are writing a “how to” that involves a computer application. This can be done with numbered steps on screenshots as in this one for positioning and inserting an image in your blog.

Visuals are particularly helpful for anything that requires the user to:

  • locate something on a piece of equipment or a toolbar – particularly one unfamiliar to them
  • move something in a particular way
  • see that changes that should result from their actions at each stage in a series of steps

The “techie” bit of making and adding visuals

My own preference for adding visuals to instructions is to use PhotoFiltre and Powerpoint as described in the Slideshare below. I create and save my labelled/annotated images, these can then be inserted directly into: blogposts, presentations or documents with the mimimum of effort.


I use this process because I find it:

  • simple and quick to do;
  • easy to edit later if needed
  • provides me with portable visuals that I can use in other applications because they are saved as images

Audio-visual instructions

Audio-visual instructions are becoming more and more common using screencasts and/or video. However these have a major disadvantage in that it is difficult to refer back to one point somewhere in the middle of the instructions without having to replay the entire sequence to find the bit you want! Using audio-visuals is therefore best kept to VERY short activities such as this screencast on attaching files to emails.

Conclusion

There are many different ways of preparing visuals for inclusion in instructions. The one described above is the one I use because it works for me. Please comment on whether you think it will work for you – why or why not?


Edublogs webinar overview – Exploring story makers

Introduction

This session, recorded as always was one in which we took a look at some online story making tools in one of our “quick and easy tools” explorations. These are occasional sessions where I put up a list of a few tools and each participant chooses one (preferably one unknown to them) to explore for ten minutes and then give feedback to the rest of us. The first time I did this the tools were a mixture of different functions however more recently I have chosen ones with similar purposes.

My personal rationale for “ten minutes to explore” is that if it takes too long to “pick up” the basics of using any tool then the focus of the “lesson” in which it is being used may change from the educational purpose to the tech being used. In other words we risk using “tech for tech’s sake” rather than as a tool to achieve the educational purpose.

The Session

The decision to explore story makers for exploration comes from the fact that I have been investigating story makers for use with my own students.  When looking for possible tools to explore I was surprised at how few there were that did not have a very heavy focus on using audio. I specifically wanted text and images both: to meet the needs of my adult literacy curriculum; and to keep the process simple. I find that  digital story making applications with audio can be time consuming for students to learn if they want (as they invariably do) both voice and music in the audio. So this session only looked at four tools – these were:

We started with a have you used it and to what degree on the four tools to be explored. This revealed that most of us had some awareness of, or familiarity with at least one or two of them and one participant was very familiar with two of the four.

The next step was for everyone to choose one of the story makers to explore and then investigate it for ten minutes with the following considerations in mind:

  • how easy to learn the basics
  • how engaging to use
  • a lesson/context in which to use it
  • whether they personally would use it with students

After the ten minutes everyone came back and took turns in talking about the ease of use and other features of the tool they had explored. There were also some great ideas for use in class.

We finished with some feedback and a look at our best takeaways from the session.

Conclusion

This was great session! These are always great fun and much enjoyed by all. I have recently shown Storybird to my own students who are taking part in the ELFADA project. One of their projects is an online story that they will embed in their blogs and they have been exploring some different types of stories made with applications they are already familiar with (PowerPoint/Slideshare and Toondoo) as well as Storybird which is new to them.

Next Webinar

Our next session will be an Edublogs “Serendipity” session on Thursday May 24th at 23:00 GMT/UTC (Afternoon/Evening USA) or Friday May 25th at 7am West Aus, mid morning Eastern States Aus depending on your timezone (check yours here) – in the usual BlackboardCollaborate room. This is one of our fortnightly unconference sessions where we invite you to bring along your “hot topics” and “burning issues” for our poll on the topic.

Planning and creating your digital story – Part 2

Introduction

Once you have ideas for your stories and have decided (after some feedback from your fellow students, lecturer and others) on your topic it is time to move on to the next part of the storymaking process.This post is about the activities you will need to complete in making your story. When you complete your “Project Plan” for making your story you will need to think in detail about

  • what you need for each stage;
  • what activities you need to carry out in each of the  stages;
  • the time taken for each activity in each stage;
  • the overall timeline and fitting it all together – remember sometimes you will have to wait for feedback – so is there something from another stage you can do while you wait?

Storyboarding

Checkout this link on Storyboarding – the focus of this one is on digital stories with an audio component but it works the same way for the type of story we are doing. This link also has a “how to” on creating your own simple storyboard template using Word. This would be a useful way for you to create your own storyboard for your story. You will need to make your storyboard and get feedback on it before you start writing your story

Images

How many images will you need? This will partly depend on the length of your story but also depends on how many separate “points” there are in the story. You need one image per “page/slide”

If your story is being made in an online application with existing artwork images you will need to find images on the site that illustrate your points well and that you can use for each page of your story.

If you are using images that you find for yourself you need to consider where you will get them – will they be your pictures or from elswhere (remember copyright). How long will it take to find and edit images so that they will fit without making your file too big. Remember that you MUST credit image sources and creators.

Writing your story (script)

If your story was going to be an audio narration this would be called “writing the script” Because we are using text you will need to write your story as a “story”.  To help you think about the structure of your story you may need to look back at the story examples from the Symbaloo Webmix of Story Links. Also you can research on the Internet for stories about similar topics to your own chosen one and see how these are put together.

Draft your story (THE SIZES BELOW ARE A GUIDE ONLY):

  • for Certificate I you need ABOUT 150-250 words (5-8 pages/slides)
  • for Certificate II you need ABOUT 250- 400 words (7-12 pages/slides)
  • for Certificate III you need ABOUT 400-600 words (10-15 pages/slides)

Once you have drafted it is time to get feedback and do the editing and redrafting process.

Think about how long each part of the story writing will take – you will need estimates for your project plan.

Putting it all together

Once you have planned your story, sorted out the sequence of images and written your text it is time to put it all together as a draft using your chosen application. This is a good time to add any page titles, and also to add credits – usually a page at the end acknowledging help and information sources. Again you will need to get feedback and “polish” your story before finally publishing it and either linking from or embedding in your blog.

Conclusion

The information in this post should help you in planning your story making project. You will need to plan and manage your own time for this project over the three weeks of the project.


Planning and creating your digital story – Part 1

Introduction

Digital stories take many forms, often they are a series of images with music and voice over. However we are going to focus on making digital stories that use text with images rather than audio.

Story ideas

Some ideas for topics, your final story doesn’t have to be one of these, they are just to help you start thinking!

  • Illustrating an aspect of your life to send to family or friends who live a long way away
  • Describing a visit, holiday, activity, event in which you have taken part
  • A portfolio of some of your work eg plans, designs, photographs of a project you have completed with descriptions and explanations
  • Illustrating, describing, explaining a leisure activity, sport, hobby or interest in which you participate
  • Demonstrating and explaining a practical skill that you have

 Outlining ideas

To help you make a final decision on what your story will be about it is a good idea to share thoughts and ideas with others, you can do this through your blog. However you will need to write short outlines of your stories to share.

Here are examples to help you.

Story outline 1. A practical skill that I have is planting plants. The story will describe how to:

  • prepare the space for the plant;
  • correctly remove it from its pot;
  • plant it; and
  • then carry out any necessary aftercare.

Story outline 2. One of my favourite places to visit is the Avon Valley National Park near Toodyay.

This story will describe a visit to the National Park during the wildflower season. I will describe the Bald Hill lookout area and also the river valley. Images to illustrate the visit will include scenery and wildflowers.

Conclusion

Think about those examples above when you are writing your own brief story outlines. Now add a comment to this post that gives some feedback suggesting changes or additions to one of the stories above that you think would make it more interesting. Just saying it is a great idea is not enough on its own 🙂