Facebook as a professional development resource/platform

Introduction

This post is for my colleagues considering the use for Facebook as a professional development platform. At some time soon I will post on using Facebook with students.

Facebook is used for social connections around the world, however it is also a great platform for professional development. Facebook has the capacity for you to “meet” others with similar interests and come together in “Groups” to discuss and share those interests. It is particularly important with Facebook that you understand and use your privacy settings so that you know who sees your posts. You also need to keep an eye on the Facebook settings because Facebook sometimes reverts things to defaults – especially what appears in your Newsfeed.

Fb1Getting started

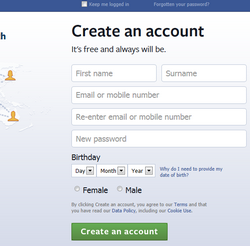
1. Go to the Facebook website and sign up. Facebook expects you to use your own name and this is the preferred option anyway if you are using Fb for professional development. I have a second completely separate Fb account (using my work email) that I use for any student interaction.

2. Once you have signed up it is important to complete at least part of your profile ideally including an image (avatar). There is much discussion about what is appropriate in terms of images. If you are using Facebook largely for PD then a photo is probably best, alternatively a cartoon image that you can create with a tool such as Mangatar.

3. Now it’s time to start “Friending” people and/or joining Groups and posting! These are two  Facebook groups for VET sector educators:

  • VET Training and Assessment Networking opportunity for VET trainers and assessors across all Industry groups
  • FS Teach Specialist group for Foundation Skills (LLN and Employability Skills) practitioners

There are many other educator groups globally and a lot of these are cross-sectoral, here are just  few:

  • Educators using Facebook  For educators to share resources ,experiences ,teaching opportunities , educational innovations , best practices and other useful links with other educators
  • FacingIT   A group managed by Australian educators for anyone facing up to the challenges of using information technologies for communicating, teaching and learning.
  • Apps for Education  This group was started so that educators can share any apps that they use for education.

For industry connections look up your own industry area in the Facebook search to find groups relevant to your industry.

Some privacy and security points

I use one Facebook account for personal purposes and professional development. If you mostly use groups for your pd then your personal connections won’t get all your pd type posts. I use a second account to keep my student interaction separate and the two accounts are not “Friends” with one another.

It is particularly important with Facebook that you understand and use your privacy settings so that you know who sees your posts.

You also need to keep an eye on the Facebook settings because Facebook sometimes reverts things to defaults – especially what appears in your Newsfeed. If it doesn’t say “Viewing most recent stories” under the box where you type your post then you will be seeing “Top posts” ie the most popular. To correct this and see all posts from your connections go to the left hand column and look at the dropdown beside “Newsfeed” (top menu item under your avatar). Choose “Most recent” then you will see all posts from those you are connected to.

Your groups are listed on the left hand side, to see posts and to post in the groups you need to be on the group page.

Conclusion

This post is just about getting started and finding some potentially useful groups for professional development and networking. If you have any questions please  comment on this post and ask your question in the comment.

Session on Blogging at WAALC

This post contains most of the content from a workshop session on getting started with blogging and its potential with students that I presented at the WA Adult Literacy Council Conference on 17/4/15. Apologies for the length of the post – I just wanted to put all the content in one place! The slides are now uploaded to Slideshare.

Writing for the world out there

Blogging for you & your students – writing for an authentic audience. In today’s session we will look at:

  • What is a blog/blogging?
  • Why should we and our students blog?
  • Why comment on posts?
  • Ground rules.
  • The mechanics of blogging – getting started.

What is a blog/blogging

  • personal place
  • work/professional space
  • online journal/diary – ideas, PD, reflecting/sharing
  • self-publishing online for a global or specific audience
  • place to share media, resources etc
  • networking – commenting
  • online portfolio – developmental, evidential
  • submit tasks & get feedback


A look at some educator and student blogs:

The following images are from student blogs created during completion of Certificates in General Education for Adults. They show some of the evidence gathering activities for which the blogs were used.

Student work1 550px Student work3 550px Student work2 550px

Why we blog

Reasons to blog

 The “mechanics” of blogging

There are many blogging platforms, personally I use Edublogs for a number of reasons:

  • educator/student focus
  • can create and manage student blogs
  • good personalisation options
  • mobile friendly
  • excellent privacy/security options
  • outstanding support/help


Getting your blog

Go to the Edublogs signup page

Complete the details and submit the information. Once your blog has been created you will get a “Congratulations” message. This will contain your:

  • Blog URL
  • Username
  • Password

Make sure you write these down!

Then you can “Login to your new blog” and start customising it. Here are a couple of posts that might help:

When you are looking for a theme to change the appearance, be sure that you use a “Mobile friendly” one.

Creating Posts

Blogs are very individual so what and how you post is very much your own decision, however you might find the following posts helpful in getting started.

Blogging is not just about writing/text,you can embed a variety of media and other tools including:

as described in this post on embedding media

You can also upload various file types including:

  • Word
  • Powerpoint
  • Images

These can be linked to from posts for:

  • Assignment submission
  • Evidencing competence
  • Drafting and feedback

If you have questions or need help then please comment on this post.


Creating publicity leaflets

Introduction

A well designed publicity leaflet can make a very large impact on the people you are trying to reach. Your leaflet should look professional and convince the reader that the organisation, product, service or event is of very high quality.

Below are some design ideas that will help you in creating a high quality product.

Content and Purpose

Keep the content limited – choose only one or two main purposes for a single leaflet. Some possible purposes for your leaflet are to:

  • highlight an aspect of a business,
  • canvas for members,
  • introduce a new aspect of an organisation,
  • present products/services,
  • publicise an event.

Decide on the audience. For example, if you are publicising/seeking members for a sport club for children will your audience be the children themselves or their parents? The audience will affect the words you might use in your leaflet and might also have an effect on the images you choose.

Audience by Drew McLellan
“Audience” Image by:drewm Drew McLellan Licensed under Creative Commons Attribution-NonCommercial 2.0 Generic (CC BY-NC 2.0)

Write the content next. Keep it simple – use short sentences, simple vocabulary, and short paragraphs. This will make your message more effective and easier for your audience to remember the main points.

Design, Organisation and Layout

Choose a size that allows you to include your content without it looking overcrowded but also avoids too much empty (white) space. The size should also suit your purpose.

Organise the text with headings/sub-headings. These headings are very important – they need to contain the whole message because many readers will skim read these to get the gist (overall idea) of the content. The text below the heading should expand on your message.

Contrasting colours are good for catching attention but take care not to overdo the colours. Make sure that text stands out from the background and the headings also stand out from the rest of the content.

Use images (graphics) that support the content. Don’t use them just because you like them. Emphasise your message by using text and graphics side by side. Images are good for making an impact. Colour images have been shown to hold the attention of readers. If you have a logo then use it to add more impact.

Information

Contact information is vital and must be accurate check the phone number, company name (spelling), full contact information, emails, websites etc. NOTE if you are making a leaflet as part of your studies you can invent contact details but be very careful that you do not accidentally use real details belonging to someone else.

Make sure that if other information is necessary that you include it – for example: opening hours, prices/costs, regular meeting times, regular match/game/coaching days and times.

Conclusion

Publicity leaflets need to be eye-catching, they also need to keep the attention of the reader once it has been “grabbed”.  Knowing your audience, using the strategies you have already learned for visual texts and planning your layout carefully will help you achieve this.


Using images to make instructions more helpful

Introduction

Simple instructions don’t always need images to make them more effective. For example recipes often don’t have images, and if they do they may often just have a picture of the finished item. However to make your instructions more effective it often helps to include one or more diagrams or other images.

How can images help?

Instructions are more effective if the number of words used can be kept fairly small. The old saying that “a picture is worth a thousand words” is very relevant for writing instructions because using an image with labels can remove the need to write long descriptions. For example the labelled picture of a chain saw below would save many words in instructing how to find the “fuel filler cap” and fill the saw with fuel.

Including the picture and referring to it from the instructions saves writing a detailed description of the “fuel filler cap”, where to find it on the saw, and how to distinguish it from the “oil filler cap”.

It is possible to make instructions even more visual especially if you are writing a “how to” that involves a computer application. This can be done with numbered steps on screenshots as in this one for positioning and inserting an image in your blog.

Visuals are particularly helpful for anything that requires the user to:

  • locate something on a piece of equipment or a toolbar – particularly one unfamiliar to them
  • move something in a particular way
  • see that changes that should result from their actions at each stage in a series of steps

The “techie” bit of making and adding visuals

My own preference for adding visuals to instructions is to use PhotoFiltre and Powerpoint as described in the Slideshare below. I create and save my labelled/annotated images, these can then be inserted directly into: blogposts, presentations or documents with the mimimum of effort.


I use this process because I find it:

  • simple and quick to do;
  • easy to edit later if needed
  • provides me with portable visuals that I can use in other applications because they are saved as images

Audio-visual instructions

Audio-visual instructions are becoming more and more common using screencasts and/or video. However these have a major disadvantage in that it is difficult to refer back to one point somewhere in the middle of the instructions without having to replay the entire sequence to find the bit you want! Using audio-visuals is therefore best kept to VERY short activities such as this screencast on attaching files to emails.

Conclusion

There are many different ways of preparing visuals for inclusion in instructions. The one described above is the one I use because it works for me. Please comment on whether you think it will work for you – why or why not?


Planning and creating your digital story – Part 2

Introduction

Once you have ideas for your stories and have decided (after some feedback from your fellow students, lecturer and others) on your topic it is time to move on to the next part of the storymaking process.This post is about the activities you will need to complete in making your story. When you complete your “Project Plan” for making your story you will need to think in detail about

  • what you need for each stage;
  • what activities you need to carry out in each of the  stages;
  • the time taken for each activity in each stage;
  • the overall timeline and fitting it all together – remember sometimes you will have to wait for feedback – so is there something from another stage you can do while you wait?

Storyboarding

Checkout this link on Storyboarding – the focus of this one is on digital stories with an audio component but it works the same way for the type of story we are doing. This link also has a “how to” on creating your own simple storyboard template using Word. This would be a useful way for you to create your own storyboard for your story. You will need to make your storyboard and get feedback on it before you start writing your story

Images

How many images will you need? This will partly depend on the length of your story but also depends on how many separate “points” there are in the story. You need one image per “page/slide”

If your story is being made in an online application with existing artwork images you will need to find images on the site that illustrate your points well and that you can use for each page of your story.

If you are using images that you find for yourself you need to consider where you will get them – will they be your pictures or from elswhere (remember copyright). How long will it take to find and edit images so that they will fit without making your file too big. Remember that you MUST credit image sources and creators.

Writing your story (script)

If your story was going to be an audio narration this would be called “writing the script” Because we are using text you will need to write your story as a “story”.  To help you think about the structure of your story you may need to look back at the story examples from the Symbaloo Webmix of Story Links. Also you can research on the Internet for stories about similar topics to your own chosen one and see how these are put together.

Draft your story (THE SIZES BELOW ARE A GUIDE ONLY):

  • for Certificate I you need ABOUT 150-250 words (5-8 pages/slides)
  • for Certificate II you need ABOUT 250- 400 words (7-12 pages/slides)
  • for Certificate III you need ABOUT 400-600 words (10-15 pages/slides)

Once you have drafted it is time to get feedback and do the editing and redrafting process.

Think about how long each part of the story writing will take – you will need estimates for your project plan.

Putting it all together

Once you have planned your story, sorted out the sequence of images and written your text it is time to put it all together as a draft using your chosen application. This is a good time to add any page titles, and also to add credits – usually a page at the end acknowledging help and information sources. Again you will need to get feedback and “polish” your story before finally publishing it and either linking from or embedding in your blog.

Conclusion

The information in this post should help you in planning your story making project. You will need to plan and manage your own time for this project over the three weeks of the project.


Planning and creating your digital story – Part 1

Introduction

Digital stories take many forms, often they are a series of images with music and voice over. However we are going to focus on making digital stories that use text with images rather than audio.

Story ideas

Some ideas for topics, your final story doesn’t have to be one of these, they are just to help you start thinking!

  • Illustrating an aspect of your life to send to family or friends who live a long way away
  • Describing a visit, holiday, activity, event in which you have taken part
  • A portfolio of some of your work eg plans, designs, photographs of a project you have completed with descriptions and explanations
  • Illustrating, describing, explaining a leisure activity, sport, hobby or interest in which you participate
  • Demonstrating and explaining a practical skill that you have

 Outlining ideas

To help you make a final decision on what your story will be about it is a good idea to share thoughts and ideas with others, you can do this through your blog. However you will need to write short outlines of your stories to share.

Here are examples to help you.

Story outline 1. A practical skill that I have is planting plants. The story will describe how to:

  • prepare the space for the plant;
  • correctly remove it from its pot;
  • plant it; and
  • then carry out any necessary aftercare.

Story outline 2. One of my favourite places to visit is the Avon Valley National Park near Toodyay.

This story will describe a visit to the National Park during the wildflower season. I will describe the Bald Hill lookout area and also the river valley. Images to illustrate the visit will include scenery and wildflowers.

Conclusion

Think about those examples above when you are writing your own brief story outlines. Now add a comment to this post that gives some feedback suggesting changes or additions to one of the stories above that you think would make it more interesting. Just saying it is a great idea is not enough on its own 🙂

What you SEE is what you learn!

Introduction

Visual texts and increasingly audio-visual texts are something we meet with all the time. Visual texts are ones where images or graphics of some kind play a major part in “getting the message across”. This doesn’t mean they are necessarily “word free”. Many visual texts combine words and images to strengthen their message. Audio-visual texts combine voice or other sounds with images to achieve their objectives.

“Good” visual texts

To be able to “write” good visual texts you need to know about some of the features that can be used to create effects as well as about the factors such as audience that will affect the content. We talked about some of these in virtual class. If you need to revisit them login to the course website and checkout the recordings for “Week 2 Day 1 – morning” and “Week 2 Day 2 – morning”. Or take a look at the slideshare

View more PowerPoint from Jo Hart
where you will also find information on signing up to ToonDoo. This is the medium we are going to use to make visual texts on online safety.

Making a visual text using ToonDoo

Those students and lecturers for our first pilot ELFADA course who were online during the virtual class session on visual texts made a Toon together. We did this through desktop sharing with each person taking turns to control my desktop and add their own choice of character and text.
This was great fun to do. Toons are a great way to express your personality online whilst staying safe! Making visual texts is a good learning activity for any subject you are studying. You can use them as we are doing to learn about and share your own ideas about online safety.
The wonderful thing about posting to blogs is that you can update posts when something changes. I am doing exactly that here by adding the joint ELFADA toon from the second group of ELFADA students. As with the previous one this was great fun to make!

Our second group joint ELFADA toon

However there are lots of other ways to use them to make learning more fun.
For example to help you remember the different meanings of two words that sound the same but have different spellings and meanings, as in this simple text above.

Saving Toons

Something we did not really cover in the session was saving your Toon and capturing the link so here is a screencast to help you if you get stuck on this.

You can add your Toons to your blog posts in two ways. We have already look at adding a link – you can do this with your Toon by saving the link and inserting it in the post. Next week we will be looking a adjusting images to a suitable size and inserting them in posts.

Conclusion

Visual texts are a great learning tool as well as being fun to make. We hope you will carry on making Toons and other visual texts for learning. Remember to leave a comment on this post. The more practise you get at commenting effectively the better. Was the post useful for you? In what way was it useful? Was there anything about it that you thought worked very well and why was this?

About texts!

Image

Introduction

This post is about texts and how we can understand their “messages” better if we consider more than just the words that are used.

Written texts

You will find that there are lots of different types of text. When we look at written texts it is useful to look at the features and think about why those particular features have been used. The use of different features can make texts more fit for their purpose by affecting how we understand them.

The Prezi shown below on “Text features and purposes” is a reminder of some important text features and text purposes.


Welcome!

Introduction

This is our course blog. The word blog is short for “weblog” which is just a name for a type of website or a where you can easily upload “stuff” for others to see. It can be all sorts of different things – it doesn’t have to be just writing. Your blog is what you want it to be – or sometimes what you need it to be to show off your skills! It can be any or all of these:

  • an online diary or record of things that you do;
  • a place to write and share ideas;
  • somewhere to include pictures, videos or other media;
  • a professional or business place;
  • a personal place where you write for yourself;
  • a portfolio where you gather evidence of your learning and/or your skills;
  • somewhere to tell others how you do things.

A piece of writing or other media that you put on your blog is called a “post” and when you put the post on the blog this is known as publishing.

What is this blog about?

This course is about making your own blog and using it to showcase your learning and skills by making posts and uploading files and using e-tools like the Voki to make your posts more interesting to make and visit. Doing this will also help you to gather evidence for three units in one of the Certificates in General Education for Adults.

This blog is here to help you with your own blog – we will do that in several different ways:

  • posts that “show and tell” how to use some of the e-tools you will use to make blog posts – they will use a mixture of writing, pictures, diagrams and sometimes audio and/or video;
  • posts that give you links to useful e-tools and how to use them;
  • we will use different e-tools to make our posts so you can see how they can be used;
  • we will comment on the posts we write so you can see how to add comments – and we will ask you to comment on the posts too.

We will set up your own blogs soon and help you to log in and get started.

Before you start with your own blog we would like you to start with making some comments on posts on the course blog. You will see that there are comments on this post, you can use these to help you get ideas about how to make comments on blog posts.

Once you have looked at the first comments on the post have a go at writing your own comment. Look at the “how to” below and follow the instructions to add your own comment.

Your comment will appear soon – at the moment we have the blog set for comments to be checked before they appear.  We will change this once you have had some practise.

Good luck with your first comment!