Introduction
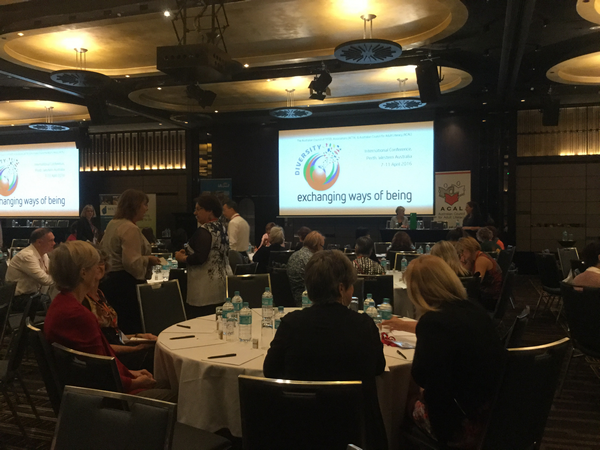
A few weeks ago (7th-11th April 2016) I went to a great conference! The “Diversity: exchanging ways of being” Conference was jointly organised by the “Australian Council for Adult Literacy” (ACAL) and the “Australian Council of TESOL Associations” (ACTA) with the local host organisations being the “WA Adult Literacy Council” (WAALC) and the “Westralian Association for Teachers of English to Speakers of Other Languages” (WATESOL). It was fantastic to have so many LLN oriented people all together in one place, fabulous sessions and incredible networking!
As always after conferences/events whether face-to-face or online I like to let my personal dust settle a little before I post my thoughts and reflections on the event. Now a few weeks later it feels like the right time to post!
I rarely attend face-to-face conferences – our own annual local WA Adult Literacy Council Conference being the only one I have attended for many years. There are several reasons for this:
- I live in regional Western Australia, not too far from Perth but a long way from the Eastern states of Australia and the rest of the world so most conferences are not easy to get to;
- I loathe flying – being both claustrophobic and not very good at heights – I find it frightening and stressful and it leaves me useless for a couple of days afterwards;
- Large International conferences are expensive – I work in the public vocational education and training sector and my organisation has only limited funds available for professional development/conferences.
I do find it frustrating that with the multiple streams available in large conferences there are always so many sessions that I can’t attend! Online conferences by contrast usually record sessions so it is possible to catch up with any of particular interest later.
The Conference
I am just so delighted that I had the opportunity not just to attend the conference but also to present a workshop.
The buzz of all those LLN people gathered in one place was phenomenal and very exciting. Strictly it was two places – because sessions were in two Perth hotels just across a street from one another. However the need to move between buildings didn’t prevent the conference running (at least as far as I saw) extremely smoothly throughout, thanks to the efforts of the organisers.
The sessions I attended were all excellent and the Keynotes were outstanding. For me this conference “walked the talk” of “exchanging ways of being”. I think that combining the ACAL and ACTA conferences provided exceptional opportunities for networking and “cross pollination” of ideas and is something the two organisations should consider again, perhaps more regularly, in the future
The only downside for me was all those sessions I would love to have attended but couldn’t because they were concurrent with something else! In my opinion this is a huge and intractable problem with all major conferences. While providing concurrent sessions is a terrific way of catering for varied interests, it does also mean often being unable to attend everything that is relevant. Possible options for large conferences might include adopting some of the practices used in online conferences such as recording of some sessions so that they can be made available afterwards as videocasts or similar.
My own session
I deliver quite a lot of presentations/workshops on using technologies for facilitating learning to colleagues. This is in my own organisation, more widely in WA and Australia and also globally. Most of these in the last 10 years (with the exception of my own organisation and our WA Adult Literacy Council Conference) have been online. In all of these sessions (face-to-face and online I strive to use interaction and activities to keep the content interesting and illustrate the engagement potential of using technology as an adjunct to learning.
There were no computers available at the conference venue for session participants so I needed to make activities feasible for a “Bring your own device” (BYOD) context. A big challenge for me as in the majority of my past face-to-face sessions the participants were using desktop computers that all had the same operating system (ie Windows) and online they were mostly using their own familiar desktops or laptops rather than mobile devices. This made it relatively easy to be sure that everyone would be able to access the same tools, that we were exploring and using in the session. In this session we had a mixture of mobile phones and tablets and Android and iOS – some of the tools I use regularly with students are not compatible with one or more of these others need an installed app to work. So it was important to have illustrations of usage in my slides to minimise the frustrations felt by those who couldn’t easily access the tools via their device.
A further challenge for me was that I wanted the session to do two things: illustrate and provide opportunities for participants to extend their PLNs (ie exchange their own ways of being), and also introduce and explore some “tech” tools that could be used with students to facilitate them in exchanging their own ways of being.
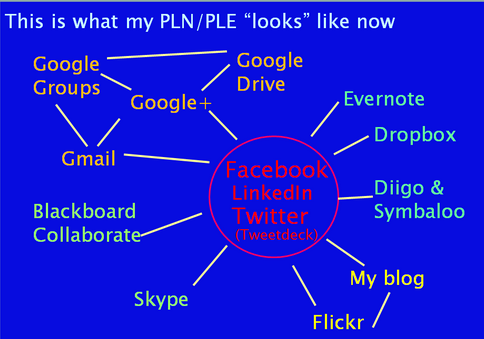
My sessions always include a lot of link sharing – online this is very easy as links can usually be shared in chat boxes and/or on whiteboards. Not so easy in a face-to-face environment! However I have developed an approach that seems to work well – I put all the links I will need to share on a blog page – in this case ACAL/ACTA Conference 2016 – with some narrative, and then create a customised “bit.ly” link for that page so that people can easily type it into their device.
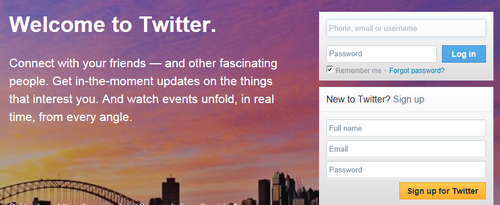
Integrating PLN development with tool sharing seemed to work very well. A lot of participants joined our FSTeach Facebook Group during the session and some tweeted with the #tag #FSTeach.
As is my wont in PD sessions I used a variety of tools and activities to encourage participation including online polling, online sticky notes and social media. I have posted the slides in Slideshare, and links to the tools and to the sticky not canvases are on the blog page ACAL/ACTA Conference 2016.
I really enjoyed doing this session – despite being quite nervous and apprehensive about whether the strategies I had planned would work. The participants were wonderful – so supportive throughout and happy and enthusiastic about engaging with the technologies. The two hours flew by and before I knew it the session was over!
Conclusion
When I was completing my workbased Adult Ed teaching qualification in the UK over 25 years ago one of our lecturers was always telling us to “take risks” – she gave us a list of strategies and said we should try them all. I felt unhappy with this – my students were studying for national exams and I was unwilling to take risks with their learning. However when I looked at the list I had already used almost all of them! My whole life in teaching seems to have been about trying different things, or the same things in different ways. Always seeking to keep it interesting and to challenge students to get involved in their own learning. I try to do this ie “walk my own talk” in PD and conference presentations as well. For me this is particularly important, with respect to technology, and using the technology to support the learning – not as an end in itself. However, having said that, with the continually increasing significance of digital skills and digital literacy for future workplaces using the technology effectively, safely and critically is itself becoming one of the objectives!
I would love to see your thoughts (comments):
- on the session – if you were there!
- on the blog page and slideshare
- on “taking risks”
- on the increasing importance of digital skills and digital literacy to foundation skills/literacy/language/numeracy teaching.