Webinar Overview – Be an “Elluminated” participant

Introduction

Our recorded Edublogs webinar this week provided me with an excuse to play with Elluminate. Occasionally I do a session on some aspect of Elluminate – usually as a result of comments and questions raised in response to using a particular tool in other sessions. This time having had quite a large number of people new to Elluminate joining our webinars in recent weeks it felt like time to take a look at getting the most out of being a participant.

The Session

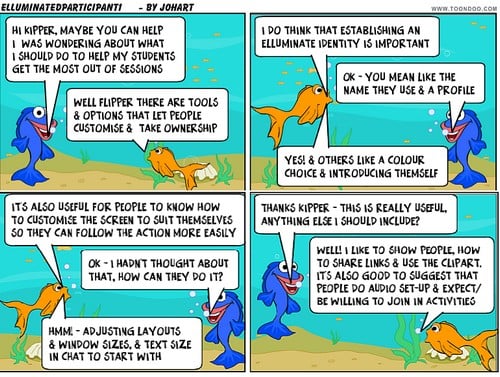
The plan for the session was to explore a variety of tools and options available to participants in Elluminate sessions. Thus providing some ideas and suggestions to help everyone get the most out of participating in interactive webinars.

The objectives were to look briefly at:

  • establishing an  “identity” in the virtual context
  • arranging the virtual environment to facilitate keeping up with events and capturing/saving content and ideas
  • active participation

Elluminated ParticipantsResize

As always the emphasis was on interaction and activities throughout using polling, whiteboard, text and experimenting with tools and options. Also as usual I tried to fit too much into the time and ended up feeling that I was rushing but the participants seemed nonetheless to find the session useful.

Conclusion

This was, hopefully, an interesting session that seemed to be enjoyed by all. As with most of these sessions this overview is no more than a fleeting glimpse and you will get much more from the recording.

Next week

SerendipitybsmallOur next Webinar is an Edublogs Serendipity – unconference session so bring along your hot topics and burning issues (what makes you spit with anger or thump a tub with passion) and throw them into the melting pot for the poll to choose our topic in the first ten minutes.

Join us on Thursday June 10th at 23:00 GMT/UTC (7pm USA EST, Midnight BST) or Friday June 11th at 1am CEST,7am West Aus, 9am NSW, depending on your timezone – in the usual Elluminate room

.

Elluminating ideas for interactivity on the whiteboard! Drag and Drop!

With students new to Elluminate I always go for a softly softly approach and try not to introduce too many new tools or strategies at once. This also sometimes applies to colleagues especially the e-phobic! If I’m working with e-philic colleagues we can have a great time looking at a whole range of different ways to use tools and keep students interacting. However I’m trying to avoid blog posts that exceed War and Peace in length! So I’ve decided to break all this whiteboard “stuff” down into smaller chunks.

I hope that Kipper and Flipper will help me make these posts memorable!

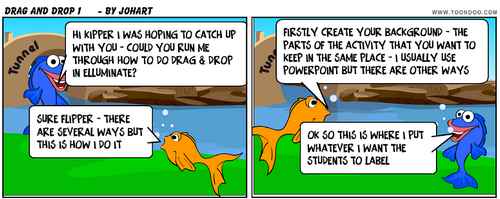
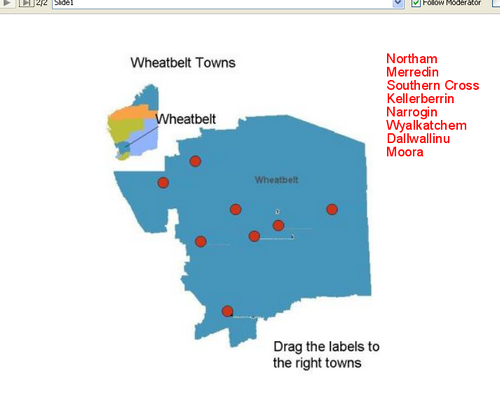
One of my favourite, and very simple activities on the whiteboard is using Drag and Drop. Here is one that I use in taster or orientation sessions for students.

OK so how do I set them up? There are many different options – these are my personal preferences and what works well for me!

Firstly I usually use PowerPoint (ppt) for my slides in virtual classes/presentations/workshops. There are a number of reasons for this:

a) have been using ppt for years so I’m very familiar with it and find it easy to use;
b) very easy to upload into Elluminate as a complete presentation rather than slide by slide;
c) have a portable, easily edited “down here” version ie not “locked in” to the need to able to open the Elluminate whiteboard file format.

1) I pre-prepare, starting with anything I want in the background in PowerPoint – for drag and drop this is the text or images that I want to be fixed (ie not “draggable” by the learners).

2) Duplicate the ppt slide and add the answers so I have an answers slide to show students after they have finished. This is a good way of making sure that I don’t miss any out from the “draggables”. Also very useful if I have a “kitten moment” at the going through the answers stage and get two of them muddled.

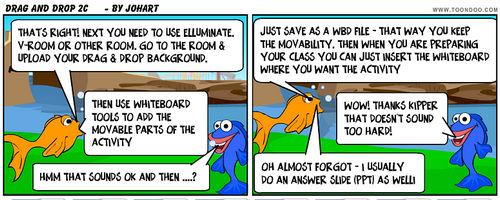
3) Upload the ppt into Elluminate – see below

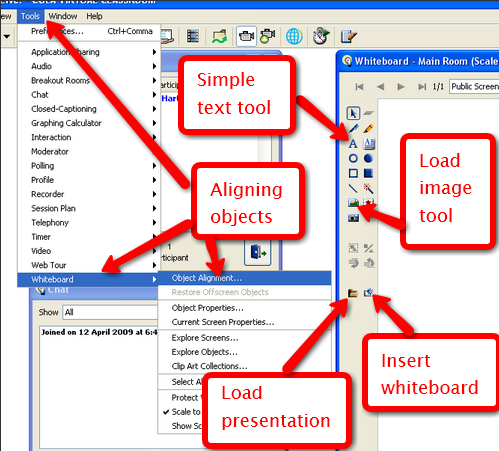
4) Go to the slide that needs the “draggables”. Use the simple text tool “A” to type your labels or add your images (if these are the “draggables”) using the add image tool (see below).

5) Tidy up the positions of your “draggables.

6) Once you are happy with the activity, save the entire presentation as a .wbd file.

7) I often create the entire drag and drop separately from the presentation it is to be embedded within. This makes it easier to add to my “resource bank” for future use with a different group or in a different place in the session.

8)It is easy to insert pre-prepared whiteboards at any point in an uploaded presentation – just create a new whiteboard (tool next to the upload presentation one) and then replace it with your pre-prepared material.

Have fun!